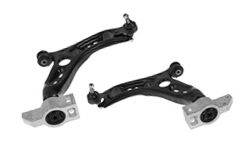
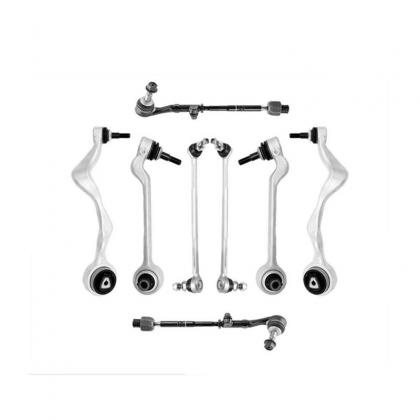
OEM Code 31126769797, 31124036269, 31122409599, 31122405861, 31126769798, 31126769802, 31124036270, 31126770849, 31122405859, 31126763699, 31126770850, 31126763700 MOQ 1 set Payment Term 30% TT Pay in Advance, Balance Pay Against B/L Copy, L/C Trading Term FOB, CIF, CFR, EXW Package Neutral Package or with Your Logo Package Service OEM & ODM
Read More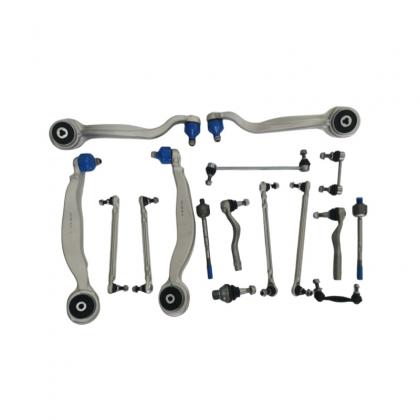
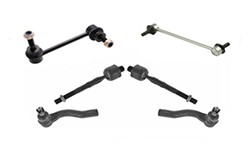
OEM Code 2123301911 / A2123301911, 2123303111 / A2123303111, 2123303211 / A2123303211, 2123202589 / A2123202589, 2123202689 / A2123202689, 2123302403 / A2123302403 / 2124600105 / A2124600105, 2123302703 / A2123302703 / 2124600205 / A2124600205, 2123302803 / 2223309502 / A2123302803 / A2223309502 MOQ 1 set Payment Term 30% TT Pay in Advance, Balance Pay Against B/L Copy, L/C Trading Term FOB, CIF, CFR, EXW Package Neutral Package or with Your Logo Package Service OEM & ODM
Read More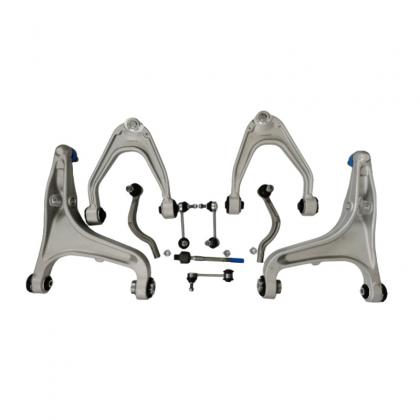
OEM Code 670107802, 670107803 MOQ 1set Payment Term 30% TT Pay in Advance, Balance Pay Against B/L Copy, L/C Trading Term FOB, CIF, CFR, EXW Package Neutral Package or with Your Logo Package Service OEM & ODM
Read More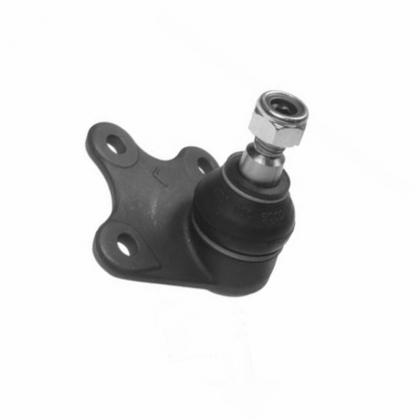
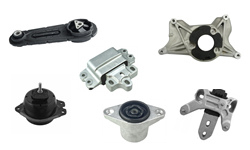
OEM Code 6Q0407365A, 6Q0407365B, 6Q0407365M, 8Z0407365A MOQ 1pcs Payment Term 30% TT Pay in Advance, Balance Pay Against B/L Copy, L/C Trading Term FOB, CIF, CFR, EXW Package Neutral Package or with Your Logo Package Service OEM & ODM
Read More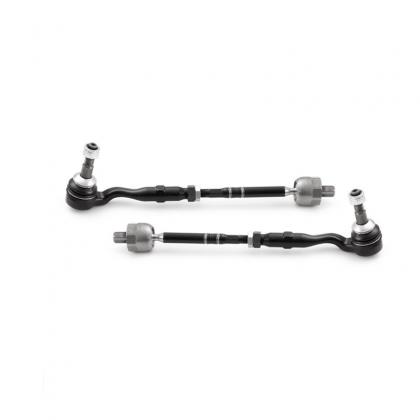
OEM Code 32106784716 MOQ 1pcs Payment Term 30% TT Pay in Advance, Balance Pay Against B/L Copy, L/C Trading Term FOB, CIF, CFR, EXW Package Neutral Package or with Your Logo Package Service OEM & ODM
Read More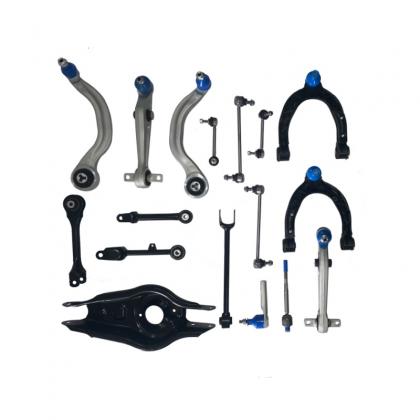
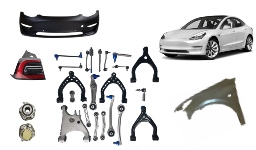
OEM Code 1044321-00-J, 1044321-00-H, 1044326-00-J, 1044326-00-H, 1044351-00-C, 1044356-00-C, 1188391-00-B, 1188396-00-B, 104483100F-N, 104483100F-W MOQ 1set Payment Term 30% TT Pay in Advance, Balance Pay Against B/L Copy, L/C Trading Term FOB, CIF, CFR, EXW Package Neutral Package or with Your Logo Package Service OEM & ODM
Read More
Worldwide Customers with High Quality

Years Experience
December
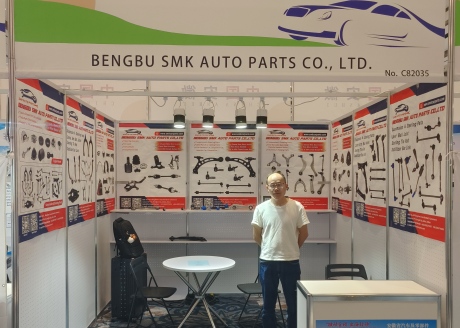
Bengbu SMK Auto Parts Co.,Ltd attend the Automotive Aftermarket Products Expo AAPEX 2024 in Las Vegas, USA. We Produce Suspension & Steering Parts Fits for VAG VW Skoda Seat Audi BMW Mini Mercedes Benz Smart Porsche Tesla Land Rover Jaguar Ford Fiat Opel Vauxhall Chevrolet Nissan Renault Toyota Mitsubishi Suzuki Peugeot Citroen Hyundai Kia Daewoo Lexus Acura Infiniti Sabaru Volvo Saab Jeep Chrysler Dodge Mercury GMC Lincoln Cadillac... Besides, We supply aftermarket parts for Tesla Model 3 Y S X Car, and stock available.
Read More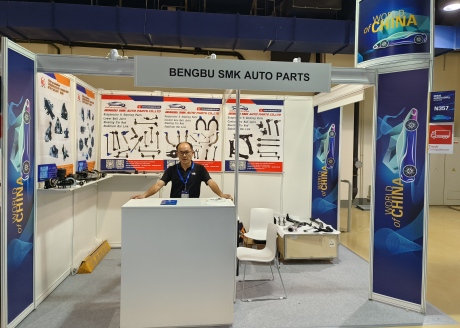
December
Bengbu SMK Auto Parts Co.,Ltd Attend the auto parts show of MIMS Automobility Moscow 2024 where we meet the customers from Russia there. We produce and supply suspension and steering parts such as control arm ball joint steering knucle shock absorber engine mounting to Russia market for Japanese car, Europe Car, Chinese car...
Read More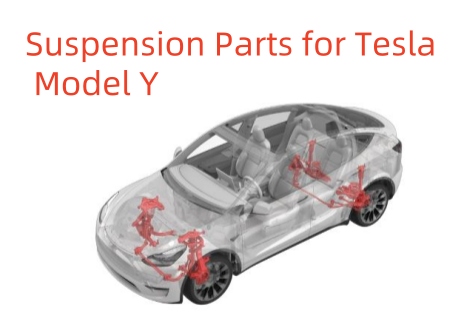
December
The Suspension Parts List and Catalogue for Tesla Model Y diagram online, contact for pdf files Model Y Collision Repair Procedures Manual aftermarket replace parts only 31 - Suspension Front and Rear Knuckle - Hub and Bearing Front and Rear Stabilizer Bar and Links Front and Rear Suspension Arms Front Coil Spring and Damper Rear Coil Spring and Damper 30 - Chassis 3001 - Chassis and Subframes FRONT SUBFRAME ASSEMBLY 1044531-01-B REAR SUBFRAME ASSEMBLY 1044580-01-D REAR SUBFRAME SHEAR PLATE- FRONT - RIGHT HAND 1044576-00-D REAR SUBFRAME SHEAR PLATE- FRONT - LEFT HAND 1044573-00-D 3101 - Front Suspension (including Hubs) FRONT KNUCKLE - LEFT HAND 1188311-00-F FRONT KNUCKLE - RIGHT HAND 1188316-00-F DRIVEN HUB 150MM FLANGE 1044121-00-E NON DRIVEN HUB 150MM FLANGE 1044122-00-E DRIVEN HUB 142MM FLANGE 1044123-00-B FR LWR COMP LINK ASSY CN, ZF LH 2188354-10-B FR LWR COMP LINK ASSY, CN, RH 2188359-10-B FRONT LOWER LATERAL LINK ASSEMBLY 1188341-00-C FRONT UPPER CONTROL ARM ASSEMBLY - LEFT HAND 1044321-00-J FRONT UPPER CONTROL ARM ASSEMBLY - RIGHT HAND 1044326-00-J FRONT UPPER CONTROL ARM ASSEMBLY - LEFT HAND 1188321-00-A FRONT UPPER CONTROL ARM ASSEMBLY - RIGHT HAND 1188326-00-A FRONT HEIGHT SENSOR ASSEMBLY - LEFT HAND 1044941-00-B FRONT STABILIZER BAR ASSEMBLY 28 MM X 5.0 MM 1144387-00-B FRONT STABILIZER BAR ASSEMBLY - 31MM X 4.7 MM 1188386-00-A FRONT STABILIZER LINK ASSEMBLY- LEFT HAND 1188391-00-B FRONT STABILIZER LINK ASSEMBLY- RIGHT HAND 1188396-00-B FRONT BRACKET- STABILIZER BAR BUSHING 1188383-00-A 3103 - Rear Suspension (including Hubs) REAR KNUCKLE ASSEMBLY - LEFT HAND 1188411-00-G REAR KNUCKLE ASSEMBLY - RIGHT HAND 1188416-00-G DRIVEN HUB 142MM FLANGE 1044123-00-B REAR LOWER AFT LINK ASSEMBLY 1044451-00-F REAR UPPER AFT LINK ASSEMBLY - 25X19 1188423-00-A REAR UPPER AFT LINK ASSEMBLY - 25X19 1188423-00-B REAR UPPER FORE LINK 1188421-00-B REAR LOWER FORE LINK ASSEMBLY 1044441-00-F REAR TOE LINK ASSEMBLY 1188431-00-A REAR HEIGHT SENSOR ASSEMBLY - LEFT HAND 1044971-00-C REAR STABILIZER BAR ASSEMBLY - 23.6MM X 3.5MM 1044481-00-E REAR STABILIZER BAR ASSEMBLY - 25.2X4.4MM 1188485-00-A REAR STABILIZER BAR LINK - LEFT HAND 1044491-00-F REAR STABILIZER BAR LINK - RIGHT HAND 1044496-00-F 3115 - Coil Spring Suspension System DAMPER ASSEMBLY COIL E3 - DUAL MOTOR - FRONT LEFT HAND 1188363-00-E DAMPER ASSEMBLY COIL E3 - FRONT LEFT HAND 1188363-00-H DAMPER ASSEMBLY COIL E1 - REAR WHEEL DRIVE - FRONT LEFT HAND 1188364-00-C DAMPER ASSEMBLY COIL E1 - REAR WHEEL DRIVE - FRONT LEFT HAND 1188365-00-B DAMPER ASSEMBLY COIL E3 - DUAL MOTOR - FRONT RIGHT HAND 1188368-00-E DAMPER ASSEMBLY COIL E3 - DUAL MOTOR - FRONT RIGHT HAND 1188368-00-H DAMPER ASSEMBLY COIL E1 - REAR WHEEL DRIVE - FRONT RIGHT HAND 1188369-00-C FRONT DAMPER ASSEMBLY - PERFORMANCE COIL - FRONT - DUAL MOTOR PERFORMANCE 1188371-00-E DAMPER ASSEMBLY COIL E3 - DUAL MOTOR PERFORMANCE - FRONT LEFT HAND 1188371-00-F FRONT DAMPER ASSEMBLY - RIGHT HAND - PERFORMANCE 1188376-00-E DAMPER ASSEMBLY COIL E3 - DUAL MOTOR PERFORMANCE - FRONT RIGHT HAND 1188376-00-F DAMPER ASSEMBLY COIL E1 - REAR WHEEL DRIVE - FRONT RIGHT HAND 1188379-00-B DAMPER ASSEMBLY COIL E1 - REAR WHEEL DRIVE - FRONT LEFT HAND 1288365-00-B DAMPER ASSEMBLY COIL E1 - REAR WHEEL DRIVE - FRONT RIGHT HAND 1288379-00-B MOUNT- FRONT UPPER CONTROL ARM - LEFT HAND 1044371-00-D MOUNT- FRONT UPPER CONTROL ARM - RIGHT HAND 1044376-00-D MOUNT ISOLATOR- FRONT UPPER CONTROL ARM - LEFT HAND 1044031-00-B MOUNT ISOLATOR- FRONT UPPER CONTROL ARM - RIGHT HAND 1044036-00-B DAMPER ASSEMBLY COIL - DUAL MOTOR - REAR 1188463-00-C DAMPER ASSEMBLY COIL - REAR WHEEL DRIVE - REAR 1188463-00-E DAMPER ASSEMBLY COIL - REAR WHEEL DRIVE - REAR 1188463-50-E DAMPER ASSEMBLY COIL - REAR WHEEL DRIVE - REAR 1188464-00-B REAR DAMPER ASSEMBLY - DUAL MOTOR PERFORMANCE 1188465-00-E DAMPER ASSEMBLY COIL - DUAL MOTOR PERFORMANCE - REAR 1188465-00-F REAR SPRING UPPER ISOLATOR 1188471-00-C SPRING, REAR, COIL 88.0-6750. 1188472-00-B SPRING - REAR - COIL 90.0-7200 1188474-00-B SPRING - REAR - COIL 90.0-7200 LOW 1188475-00-D SPRING - REAR - COIL 81-6850 1188476-00-B REAR SPRING ASSEMBLY - COIL 88-6850 1188479-00-A REAR SPRING ASSEMBLY COIL 81-7300 2288474-00-A REAR SPRING LOWER ISOLATOR 1044479-00-E RETENTION WASHER - M10. 1044407-00-A REAR JOUNCE BUMPER 1044464-00-C
Read More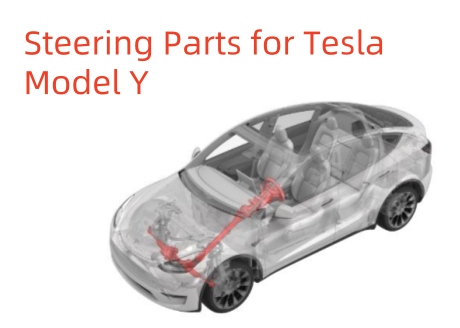
December
Steering Parts online Catalogue Diagram List for Tesla Model Y, for pdf files contact us. Model Y Collision Repair Procedures Manual or Aftermarket Replace use 32 - Steering 3201 - Steering Rack and Lower Column STEERING GEAR ASSEMBLY - LEFT HAND DRIVE 1044832-00-B STEERING GEAR ASSY, LEFT HAND DRIVE 1188833-00-A 3205 - Upper Column and Steering Wheel STEERING WHEEL - PUR LEATHER 1490214-CN-D STEERING WEEL ASSEMBLY - PUR HEATED 1626599-00-D Steering Rim Assembly 2092566-00-A ELECTRIC STEERING COLUMN - LEFT HAND DRIVE 1188871-00-A STEERING COLUMN CONTROL MODULE 1097662-00-R INSTRUMENT PANEL STEERING COLUMN SHROUD UPPER ASSEMBLY 1683771-00-A STEERING WHEEL SWITCH - LEFT HAND - MATTE ALUMINUM 1094966-02-G STEERING WHEEL SWITCH - RIGHT HAND - MATTE ALUMINUM 1094965-02-G STEERING WHEEL ELECTRONIC CONTROL UNIT ASSEMBLY 1101556-03-C STEERING WHEEL - LOWER SPOKE COVER 1096972-00-D STEERING WHEEL - LOWER SPOKE COVER 1626612-00-A INSTRUMENT PANEL - STEERING COLUMN - SHROUD LOWER SUB 1099284-80-E INSTRUMENT PANEL - STEERING COLUMN - SHROUD LOWER SUB 1683775-00-A HEATED SWITCH SPOKE BRIGHT SURROUND 1508162-00-B STEERING WHEEL BRIGHT SURROUND 1626613-00-B SWITCH HARNESS 1508163-00-B SWITCH HARNESS 1626615-00-A STEERING WHEEL - HORN ASSEMBLY 1119156-00-D INSTRUMENT PANEL STEERING COLUMN UPPER GAP HIDER ASSEMBLY 1683951-00-A
Read More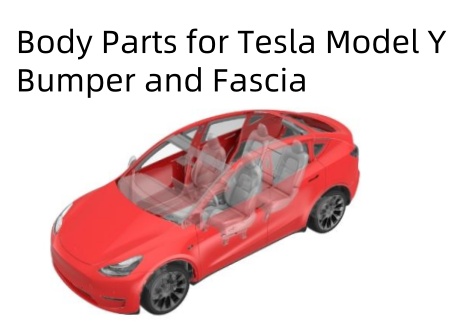
December
The Body Parts List and Catalogue for Tesla Model Y diagram online, contact for pdf files Model Y Collision Repair Procedures Manual aftermarket replace parts only Bumper and Fascia 10 - Body Front and Rear Bumper Carrier Front and Rear Bumper Fascia Front and Rear Energy Absorber Front Grille and Applique Body Side Panels Center Under Body Closure Panels Front Fenders Front Inner Panels Front Inner Panels Structural Pack NVH Damping and Paint Armor Rear End Panels Rear Quarter Inner Panels Rear Under Body - One Piece Rear Under Body - Two Piece Roof Panels Structural Repair Consumables Front and Rear Door Glass Roof Glass Windshield and Liftgate Glass 1001 - Bumper and Fascia GRILLE - FRONT FASCIA 1493759-00-A TOW HOOK COVER - FRONT FASCIA 1493746-00-A TOW HOOK COVER - REAR FASCIA 1494426-00-A TOW HOOK 1077570-00-D COMPONENT - FRONT END CARRIER 1660026-00-A UPPER LEG SUPPORT 1495093-00-C LOWER GRILLE - FRONT END MODULE BRACKET 1514466-00-A FRONT FASCIA SERVICE - WITH PARKING ASSIST BRACKETS - UNPAINTED 1493736-SC-A FRONT FASCIA SERVICE - WITHOUT PARKING ASSIST BRACKETS - UNPAINTED 1493736-SC-C BRACKET - FASCIA SIDE TO FENDER - RIGHT HAND 1493771-00-B BRACKET - FASCIA SIDE TO FENDER - LEFT HAND 1493770-00-B BRACKET - FASCIA FRONT CENTER FENDER - LEFT HAND 1493772-00-B BRACKET - FASCIA FRONT CENTER FENDER RIGHT HAND 1493773-00-B BASE - FRONT FOG LAMP COVER - LEFT HAND 1490022-00-A BASE - FRONT FOG LAMP COVER - RIGHT HAND 1490023-00-A ASSEMBLY - FRONT BUMPER BEAM 1487601-00-F FRONT BUMPER BEAM FOAM 1487605-CN-A ASSEMBLY - ANKLE CATCHER 1505433-00-C ASSEMBLY - CRUSH CAN - LEFT HAND 1487461-00-E ASSEMBLY - CRUSH CAN - RIGHT HAND 1487462-00-E ASSEMBLY - CRUSH CAN FRONT SUBFRAME 1109193-00-C BRUSH CLIP - 6.5X33 - PA66 - B 1526009-00-A REAR FASCIA SERVICE - WITH PARKING ASSIST BRACKETS - UNPAINTED 1493735-SC-A REAR FASCIA SERVICE - WITHOUT PARKING ASSIST BRACKETS - UNPAINTED 1493735-SC-C LOWER REAR FASCIA 1494006-00-B TRAILER HITCH COVER ASSEMBLY - REAR FASCIA BASE 1494009-00-B BRACKET REAR CENTER ASSEMBLY 1494045-00-E TOW HOOK COVER - REAR FASCIA 1494426-00-A TAIL LAMP BRACKET ASSEMBLY LEFT HAND 1506968-00-E TAIL LIGHT BRACKET ASSEMBLY - RIGHT HAND 1506969-00-E REAR WING BRACKET - ASSEMBLY - LEFT HAND 1494043-00-A REAR WING BRAKET - ASSEMBLY - RIGHT HAND 1494044-00-A ASSEMBLY - REAR BUMPER BEAM 1487616-00-B 1010 - Body Panels ASSEMBLY - BODY SIDE OUTER LEFT HAND SERVICE E-COATED 1511000-S0-A 1511000-ST-A ASSEMBLY - BODY SIDE OUTER RIGHT HAND SERVICE E-COATED 1512000-S0-A 1512000-ST-A ASSEMBLY - AB PILLAR OUTER - LEFT HAND 1549228-S0-A ASSEMBLY - AB PILLAR OUTER - RIGHT HAND 1549229-S0-A REAR QUARTER OUTER ASSEMBLY - LEFT HAND SERVICE E-COAT 1549230-S0-A REAR QUARTER OUTER ASSEMBLY - RIGHT HAND SERVICE E-COAT 1549231-S0-A PANEL - REAR QUARTER OUTER - LEFT HAND 1487421-S0-E PANEL - REAR QUARTER OUTER - RIGHT HAND 1487422-S0-E ASSEMBLY - BODY SIDE OUTER FRONT CAP - LEFT HAND 1487427-S0-A ASSEMBLY - BODY SIDE OUTER FRONT CAP - RIGHT HAND 1487428-S0-A FENDER BRACKET - LEFT HAND 1487429-S0-C FENDER BRACKET - RIGHT HAND 1487430-S0-C ASSEMBLY - FENDER LOWER BRACKET - LEFT HAND 1487443-S0-A ASSEMBLY - FENDER LOWER BRACKET - RIGHT HAND 1487444-S0-A ROOF RACK BRACKET - FRONT - LEFT HAND 1487431-S0-B ROOF RACK BRACKET - FRONT - RIGHT HAND 1487432-S0-B ROOF RACK BRACKET - REAR - LEFT HAND 1487433-S0-B ROOF RACK BRACKET - REAR - RIGHT HAND 1487434-S0-B ASSEMBLY - DOOR RING OUTER - LEFT HAND 1487697-S0-F ASSEMBLY - DOOR RING OUTER - RIGHT HAND 1487698-S0-F ASSEMBLY - DOOR RING OUTER - LEFT HAND SERVICE E-COATED 1609143-S0-D ASSEMBLY - DOOR RING OUTER - RIGHT HAND SERVICE E-COATED 1609144-S0-D ASSEMBLY - DOOR RING INNER WITH HEADER REINFORCEMENT - LEFT HAND SERVICE E-COATED 1487725-S0-A 1487725-ST-A ASSEMBLY - DOOR RING INNER WITH HEADER REINFORCEMENT - RIGHT HAND SERVICE E-COATED 1487726-S0-A 1487726-ST-A ASSEMBLY - DOOR RING INNER - STRUCTURAL PACK - LEFT HAND 1608447-S0-F ASSEMBLY - DOOR RING INNER - STRUCTURAL PACK - RIGHT HAND 1608448-S0-E SIDE SILL INSERT 1526249-S0-D 1626431-S0-D ASSEMBLY - COWL SIDE INSTRUMENT PANEL - BULKHEAD - LEFT HAND SERVICE E-COAT 1487693-S0-A ASSEMBLY - COWL SIDE INSTRUMENT PANEL BULKHEAD RIGHT HAND SERVICE E-COATED 1487694-S0-A COWL SIDE BULKHEAD LEFT HAND SERVICE E-COATED 1487729-S0-A COWL SIDE BULKHEAD RIGHT HAND SERVICE E-COATED 1487730-S0-A SILL INNER LOWER REINFORCE SERVICE E-COATED 1516583-S0-A 1516584-S0-A SILL INNER FRONT CLOSE OUT LEFT HAND SERVICE E-COATED 1518729-S0-A SILL INNER FRONT CLOSE OUT RIGHT HAND SERVICE E-COATED 1518730-S0-A ASSEMBLY - SILL INNER LOWER EXTENSION - LEFT HAND 1434970-S0-D 1474167-S0-B PANEL - SILL INNER LOWER EXTENSION - RIGHT HAND 1474168-S0-F EXTENSION SILL INNER LOWER RIGHT HAND E- COATED 1614230-ST-C ASSEMBLY - SILL INNER LOWER EXTENSION - STRUCTURAL PACK - LEFT HAND 1634970-ST-C FRONT SILL INSERT SECTION KIT 1467695-00-B HOOD ASSEMBLY COMPONENT SERVICE E-COATED 1493370-E0-A 1493370-ET-A HOOD BUMPSTOP 1090735-00-E FRONT DOOR - LEFT HAND - SERVICE E-COA...
Read More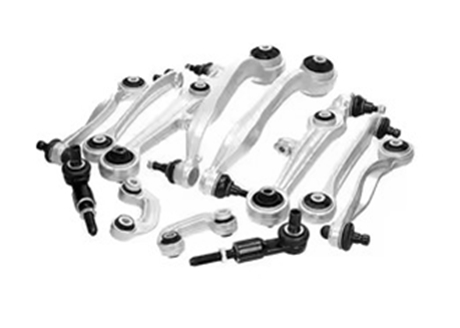
January
To maintain your car’s suspension parts for a longer lifespan, here are some friendly and practical tips: *Regular Inspections: Check your suspension components like shock absorbers, strut mounts, springs, and bushings frequently for wear, cracks, or leaks. Early detection helps avoid bigger repairs. *Keep It Clean and Lubricated: Dirt and grime can wear parts faster. Clean suspension parts occasionally and lubricate joints and bushings as recommended. *Avoid Rough Driving: Aggressive driving, including sudden braking, fast cornering, and hitting potholes or curbs, puts extra stress on suspension parts, shortening their life. *Maintain Proper Wheel Alignment: Misaligned wheels cause uneven stress on suspension parts and tires. Get your alignment checked regularly, especially after hitting bumps or potholes. *Check Tire Pressure and Condition: Properly inflated and balanced tires reduce strain on your suspension and improve ride quality. *Replace in Pairs: When replacing shocks or springs, replace both sides to keep the system balanced and working smoothly. *Timely Repairs: Don’t ignore warning signs like unusual noises, uneven tire wear, or excessive bouncing; fix worn parts promptly to prevent further damage. *Drive Smoothly Over Rough Roads: Slow down on bumps and avoid potholes whenever possible to minimize shock impact.
Read More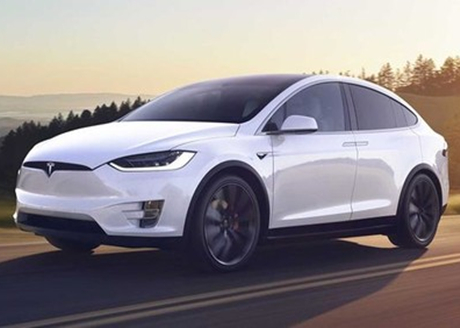
January
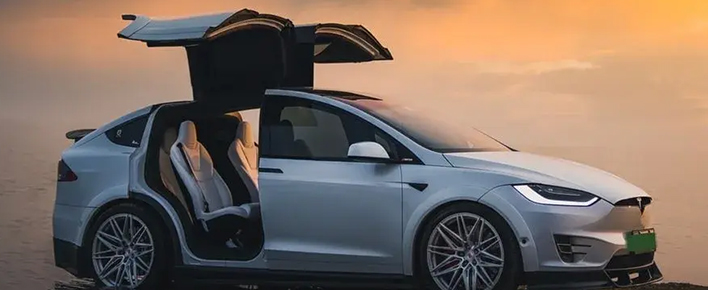
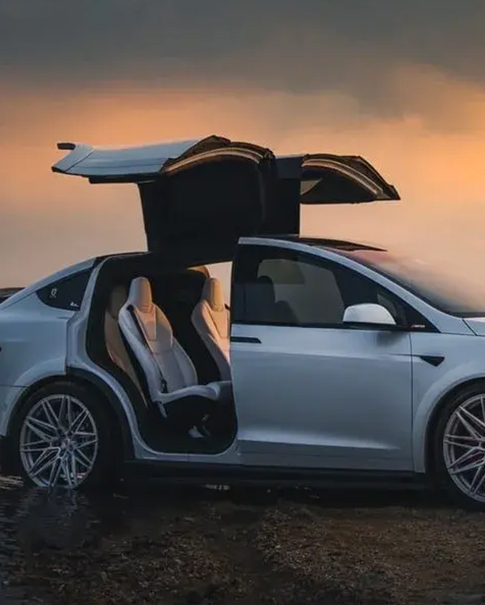
2016 (Launch Year): The Model X debuted with unique features like falcon-wing rear doors, all-wheel drive, and impressive range (~250 miles). The interior was spacious with seating for 7. 2017: Tesla improved range slightly and added more Autopilot features. Early models had some reliability issues that were gradually fixed. 2018: Range and performance got a boost, including the introduction of the P100D version with Ludicrous Mode for super-fast acceleration. 2019: Tesla updated the interior with a new touchscreen for rear passengers, more refined heat pump HVAC system for better efficiency, and improved Autopilot hardware. 2020-2021: Over-the-air software updates continued to enhance features, adding Full Self-Driving capabilities and improved infotainment options. Range increased to around 340 miles depending on the variant. 2022: Tesla introduced the “Plaid” Model X version with dramatically increased performance (0-60 mph in ~2.5 seconds) and updated interior design elements. 2023 and Beyond: Minor improvements in software, range, and efficiency. Tesla often rolls out updates gradually, so changes aren’t always tied to the model year.
Read More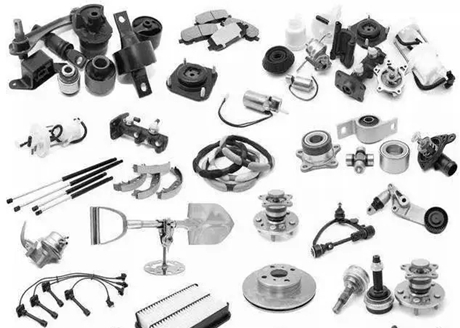
January
1.1. Functional System-Based Classification Propulsion System: Generates the power to move the vehicle. Chassis System: Provides the structural framework and supports the vehicle's weight. Suspension and Steering System: Controls the vehicle's motion and handling. Braking System: Stops or slows the vehicle. Electrical and Electronic System: Powers the vehicle and controls its functions. Body and Interior System: Encloses and protects the occupants and cargo. Exhaust System: Manages the removal of waste gases from the engine. Transmission System: Transmits power from the engine to the wheels. 1.2. Physical Location-Based Classification Front End: Includes parts such as the radiator, headlights, grille, and front bumper. Under the Hood (Engine Bay): Contains the engine, transmission, battery, and related components. Interior: Comprises seats, dashboard, steering wheel, climate control, and entertainment systems. Exterior: Includes the doors, trunk, fenders, and rear bumper. Undercarriage: Houses the suspension, exhaust, driveshaft, and differential. 1.3. Role and Function-Based Classification Structural Components: Provide the vehicle's rigidity and safety, such as the frame, unibody, and pillars. Power Generation Components: Convert fuel into mechanical energy, primarily the engine. Power Transmission Components: Transfer energy from the engine to the wheels, including the transmission and driveshaft. Control and Safety Components: Govern vehicle behavior and protect occupants, like the steering, brakes, and airbags. Environmental Control Components: Maintain the interior environment, such as HVAC and lighting systems. Passenger and Cargo Components: Enclose and carry the vehicle's occupants and goods. 2.1. Propulsion System The heart of the vehicle, this system converts fuel into motion. It is undergoing a significant transformation with the rise of electrification. Key Components: Internal Combustion Engine (ICE): Converts chemical energy from fuel into mechanical energy through a series of controlled explosions (combustion). Electric Motor: Converts electrical energy from the battery into rotational force to power the wheels. Hybrid System: Combines an ICE with one or more electric motors to optimize efficiency and performance. Fuel System: Delivers fuel to the engine for combustion. Air Intake System: Supplies the engine with the oxygen needed for combustion. Exhaust System: Removes exhaust gases from the engine. 2.2. Chassis System The chassis is the vehicle's skeleton, providing the foundation for all other components. It supports the vehicle's weight, distributes loads, and isolates the body from road vibrations. Key Components: Frame: The rigid structure that supports the body and suspension. It can be a traditional ladder frame or a unibody (monocoque) structure where the body itself provides much of the strength. Unibody (Monocoque) Structure: A modern design where the vehicle's body and chassis are integrated into a single unit, offering greater rigidity and safety. Body-on-Frame Structure: An older design where the body sits on top of a separate, box-like frame. It is common in heavy-duty trucks and SUVs. Subframes: Separate, lighter structures attached to the main frame that support the front or rear suspension and powertrain. 2.3. Suspension and Steering System This system controls the vehicle's ride quality, handling, and stability, providing a smooth and controlled driving experience. Key Components: Suspension System: Struts: Combine a shock absorber and a coil spring into a single unit. Shock Absorbers (Damper): Control the movement of the springs. Springs (Coil, Leaf, Air): Support the vehicle's weight and absorb road impacts. Control Arms: Connect the wheels to the vehicle's frame. Sway Bars (Anti-roll Bars): Reduce body roll during cornering. Steering System: Steering Wheel: The driver's interface for control. Steering Column: Transmits the driver's input from the wheel to the steering gear. Steering Gear (Rack and Pinion): Converts the rotational motion of the steering wheel into the linear motion needed to turn the wheels. Power Steering Pump: Assists the driver in turning the steering wheel, especially at low speeds. 2.4. Braking System The braking system is a critical safety component that enables the driver to control the vehicle's speed and bring it to a stop. Key Components: Brake Pedal: The driver's input mechanism. Master Cylinder: Converts the force from the brake pedal into hydraulic pressure. Brake Lines: Transmit hydraulic fluid throughout the system. Brake Calipers: Contain the brake pads and clamp them against the rotors. Brake Rotors (Discs): Rotate with the wheels and are the surfaces against which the brake pads press. Brake Pads: Friction materials that create the force needed to slow down the vehicle. Drum Brakes: Found on the rear wheels of many vehicles, they use brake shoes that press against the inside of a rotating drum.
Read More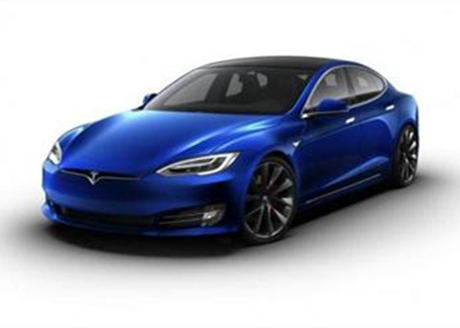
December
2012–2025 Tesla Model S: Year-to-Year Changes & Generations Model S Generations and Refreshes Year-by-Year Changes (2012–2025) 2012–2013: Founders Series and First Updates 2014: Mid-Life Update and Autopilot Hardware 2015: Power Upgrades and Interior Changes 2016: First Major Refresh and Software Updates 2017: Upgraded Seats and Suspension 2018: Interior Refinements and New HW 2019: “Raven” Upgrade and HW3 2020: Long Range+ and Plaid Announcement 2021: Model S Refresh (“Palladium”) 2022: Minor Changes and Updates 2023: Steering Wheel Change and New Features 2024: Updates and Luxury Package 2025: Luxury Package and Minor Upgrades Model S Versions and Performance Comparison Model S Generations and Refreshes The Model S has seen four major generations or design iterations since its debut . These generations are defined by major design changes and powertrain overhauls: First Generation (2012–2016): The original Model S, launched in 2012, featured the “Nosecone” front design (with a black nose cone trim) and early battery options. Early versions had a rear-drive 40 kWh battery and later 60, 85, and 85D (dual-motor) models. This generation included the 2012 “Founders Series” and early 2013–2015 models. A minor facelift in 2014 improved the rear door hinges and interior, but the body remained largely unchanged until 2016. The first generation culminated with the introduction of the P90D in 2015 and the P100D in 2016, introducing Ludicrous Mode performance upgrades . Second Generation (2016–2019): In 2016, Tesla released the first major design refresh, often referred to as the “Facelift” generation. It dropped the black nose cone, adopted a new front fascia similar to the Model X, and introduced LED headlights, a true HEPA cabin air filter (with “Bioweapon Defense Mode”), and a smaller front trunk to accommodate the filter . This generation also included hardware updates like Autopilot (initially with Mobileye) and a new Premium Interior with leather seating options. The second generation lasted through 2019 and saw the introduction of the Model S P100D (2016) and the Model S 75D, 100D, and P100D (2017–2018). In mid-2019, Tesla performed a significant powertrain upgrade (codenamed “Raven”), which included replacing the front motor with a more efficient permanent-magnet motor and improving battery thermal management . The Raven update gave the Model S improved range and performance (e.g. 0–60 mph in ~2.5 seconds for the 100D and ~2.2 seconds for the P100D). This period also introduced the Model S 100D and the high-performance P100D, which set new acceleration records. Third Generation (2020–2022): The third generation, often known as the “Raven” generation, refers to Model S vehicles from late 2019 onward that received the powertrain upgrade and adaptive suspension. These cars use the new Raven hardware (permanent-magnet front motor, improved battery pack, adaptive air suspension) and are identified by a slight change in model numbering (e.g. Long Range, Performance). The Raven generation included the Model S 75D (phased out in 2019), 100D (phased out in 2020), and the Long Range and Performance models from 2020–2021. This generation saw Tesla shift from referring to battery sizes to using “Standard Range,” “Long Range,” and “Performance” designations. Notably, the Model S Long Range+ was introduced in 2020 with a small range boost (achieved by improving battery chemistry) . The third generation ended in 2022 as Tesla prepared for a full redesign. Fourth Generation (2023–present): The fourth generation is the fully redesigned Model S, launched in 2021 as the “Palladium” refresh. This generation features a completely new interior (with a yoke steering wheel, large infotainment screen, and new rear entertainment screen), a revised powertrain (three-motor Plaid variant added), and significant improvements in performance and range . The 2021–2022 Model S Plaid (Palladium) can accelerate 0–60 mph in under 2 seconds and reach over 200 mph, while the Long Range model has a 400+ mile EPA range . This generation is still in production, with minor updates in 2023 and 2024 (discussed below). The 2023 refresh added a round steering wheel option and updated braking for the Plaid, and in 2024 Tesla introduced a “Luxury Package” that bundles perks like free supercharging and premium connectivity . The fourth generation is often considered the third generation in some contexts, but Tesla has officially designated the 2021 refresh as a new iteration . Year-by-Year Changes (2020–2025) Below is a detailed timeline of the Tesla Model S’s evolution year by year, including hardware changes, software updates, and performance milestones: 2020: Long Range+ and Plaid Announcement 2020 brought a few key updates. Tesla improved the battery chemistry of the Long Range model, increasing its EPA range slightly to 390 miles (now dubbed “Long Range+”) . Th...
Read More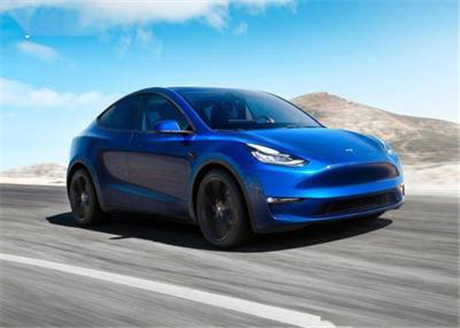
December
The Tesla Model Y has evolved significantly since its initial release, with major updates occurring in 2022, 2023, and most recently in 2025. Here's a breakdown of the key differences by year and trim level: 2021 vs 2022 Differences: The 2022 Model Y featured subtle aerodynamic improvements in headlights and bumpers New wheel designs were introduced The infotainment system was upgraded with better responsiveness and enhanced gaming capabilities Interior received improved legroom and premium material options Performance improvements included increased horsepower (from 384 to 456 hp) and torque (from 375 to 420 lb-ft) Acceleration improved from 5.3 seconds to 4.8 seconds (0-60 mph) for the Performance variant Range increased slightly from 326 miles to 330 miles New color options were added, including midnight silver Base price increased from around 41,990 to41,990 to 46,990 2023 Updates: Introduction of new colors: Quicksilver Paint and Midnight Cherry Red (for Berlin-built models) Suspension changes resulted in a smoother ride with increased top support stiffness and reduced spring rates Interior updates included new trim material, additional ambient lighting, and black Gemini wheel covers Rear parcel shelf was added to cars, initially for China and Berlin production, later globally Texas production began using 4680 batteries, though these were effectively Short Range RWD models Berlin production started making Long Range AWD models in addition to Performance models Tesla Vision system replaced ultrasonic parking sensors in most markets starting October 2022 2024 Updates: Introduction of adaptive headlights on cars with matrix lights Model Y production in China switched to HW4 with tweaked cameras and new processing capability Berlin production also switched to HW4 New option codes RNG4 and RNG5 described as Energy Boost or Range Extender Tesla renamed Autopilot HW4 to AI4 2025 Major Refresh (Juniper Update): The 2025 Model Y represents the most significant update since launch with both exterior and interior redesigns: Exterior Changes: Front and rear lightbars giving the vehicle a more distinctive appearance Slimer headlight design that blends into a single LED strip across the hood Redesigned front fascia with a 180-degree front camera for improved Autopilot functionality Revised rear bumper and taillights with integrated ambient lighting Aerodynamic improvements contributing to increased range Interior Improvements: Dashboard wrapped in fabric with horizontal light bar for ambient illumination Redesigned seats with better support, longer base cushions, and ventilation (first time for Model Y) Perforated upholstery for improved climate control Rear entertainment screen allowing passengers to access media, games, and climate controls Reconfigured center console with hidden cup holders and additional storage Higher-quality materials throughout Technology & Performance: Improved acoustic glass reducing cabin noise by 20% Upgraded tires developed by Tesla for better efficiency and reduced road noise Enhanced suspension with firmer damping borrowed from updated Model 3 for better road feedback No changes to battery or motor configurations, but range improved to 353 miles for Long Range models Rear infotainment screen with Bluetooth pairing for up to two headsets Trim Levels: Model Y Long Range Rear-Wheel Drive ($44,990): Longest range of any Model Y trim: 320 miles Single motor between rear wheels 0-60 mph in 6.5 seconds Best value option for temperate climates Model Y Long Range All-Wheel Drive ($47,990): Dual-motor setup with power to all four wheels Range of 308 miles Faster acceleration: 0-60 mph in 4.8 seconds Better for snowy/rainy conditions or those wanting extra performance Model Y Performance All-Wheel Drive ($51,490): Sportiest Model Y with aggressive body kit and 21-inch sport wheels Fastest acceleration: 0-60 mph in 3.5 seconds Range of 279 miles Carbon fiber spoiler and performance-focused features 2025 Model Y Performance Special Variant: Most powerful Model Y with 0-62 mph in 3.5 seconds (WLTP) Top speed of 155 mph (250 km/h) WLTP range of 360 miles (580 km) Adaptive suspension with multiple driving modes 16-inch UHD center screen (vs 15.4 inches on other trims) Sports seats with thigh extension, heating, and cooling Carbon fiber interior touches Starting price of approximately 72,000 in Europe (about72,000inEurope(about10,500 more than Long Range AWD) The 2025 refresh represents Tesla's effort to refine the Model Y into a more premium product while addressing previous criticisms about ride quality and interior materials. While the price has increased significantly for the refreshed models, the improvements in comfort, technology, and driving dynamics make it a more compelling luxury SUV competitor.
Read MoreOur high-quality suspension, steering, and aftermarket Tesla parts are precision-engineered for a perfect fit and enhanced performance.
Anhui SMK Auto Parts Co., Ltd. has robust production capabilities to produce and supply high-quality suspension steering parts and aftermarket Tesla parts, meeting diverse customer needs efficiently.
SMK company supply auto parts for below car aftermarket parts: Japanese car: Toyota, Honda, Nissan, Mazda, Subaru, Mitsubishi, Suzuki, Isuzu... European car: BMW, Benz, VW, Audi, Skoda, Porsche, Maserati, Renault, Peugeot, Citroen, Fiat, Opel, Land Rover... American car: Tesla, Ford, Chrysler, Cadillac, Buick, GMC, Chevrolet, Lincoln, Fiat, Dodge, ... Korean car: Hyundai, Kia, Daewoo... Chinese car: Chery, Geely, GreatWall, Haval, BYD, Changan, JAC... We supply parts worldwide: USA, Canada, Europe, Mexico, Colombia, Korea... We are leading supplier for below auto parts: Suspension & Steering Parts(Control Arm, Steering Tie Rod, Stabilizer Link...) Tesla Aftermarket Parts. Engine Mounting/Transmission Mount SMK Auto parts is specifically designed for the automotive repair parts. Our chassis components undergo rigorous testing to easily withstand the complex and variable road conditions and climate. The products not only offer exceptional durability but also provide broad compatibility and excellent stability, ensuring long-term, reliable support for your vehicles. Many overseas clients have established long-term partnerships with us. With the continuous accumulation of customer resources, many overseas clients entrust us with the production of various types of automotive parts products. In order to meet the diversified needs of customers, we have actively expanded new product lines. We adhere to high manufacturing standards, ensuring each product meets the strict safety and durability requirements of different markets. We invite customers from worldwide to choose our products and provide stronger protection and performance upgrades for your vehicles! SMK always adhere to customer-centric, continuously improve product quality and service levels, and strive to create greater value for global customers. In the future, we will continue to adhere to the principle of “quality first, customer first” and work hand in hand with our partners to create a better future.


