 Language
 English
 français
 Deutsch
 русский
 español
 português


What Are You Looking For?

News

When an Audi Q5 enters the store, the owner describes a problem where the chassis makes a very noticeable clicking sound when turning while driving, but it rarely occurs when driving in a straight line, only during noticeable acceleration and deceleration. For such a problem, the master must conduct a test drive to determine. First, let's take a look at the dashboard. The total mileage has exceeded 140000 kilometers, and the car was produced in 2016 with four-wheel drive. After the test drive, the master can basically determine that the problem is with the right front half shaft, which is likely to be the problem with the outer ball cage of the right front half shaft, but further inspection is needed. Then the master lifted the car up and we took a look at the condition of this Audi Q5 after 9 years and 140000 kilometers of driving. Let's look from the back to the front, as shown in the figure below. The rear suspension is a trapezoidal linkage independent suspension. The sturdy rear suspension is made of steel material, while the rest of the components are mostly made of aluminum alloy material. After inspection by the technician, it was confirmed that there are no problems with the rear suspension components, and they are mostly original car parts. Looking at the rear differential shown in the picture, there is a separate iron block at the rear that buffers resonance and is fixed to the rear subframe. There is a plastic small protective plate at the bottom of the subframe to prevent the sound of stones splashing. Let's take a look at the front suspension, which belongs to the five link independent suspension. The lower two connecting rods are made of aluminum alloy material, and the steering knuckle and upper fork arm are both made of aluminum alloy material. We noticed a problem with the right front suspension, where the aluminum alloy steering knuckle was covered in a layer of black grease. The outer ball cage cover was loose and loose, and the technician inquired and learned that the ball cage cover was replaced later. The old ball cage cover has been leaking oil. Compared to the suspension on the left, there is no oil pollution at all. The outer ball cage cover of the half axle here is normal and still the original car ball cage cover. Subsequently, the master checked the outer ball cage of the left half axle and asked another master to get on the car and start the vehicle, causing the wheels to turn. He checked the outer ball cage of the right half axle again and confirmed that the abnormal noise was coming from the position of the outer ball cage. The problem was confirmed. The master said that the repair method is to replace the damaged half shaft outer ball cage, usually by replacing this half shaft.
Read More
Let's take a brief look at the interior of the Volkswagen Lavida's front bumper. The reason for removing the front bumper was due to scratches on the front and damage to the lower decorative strip. To replace it, the front bumper needs to be removed. As shown in the picture below, the front bumper has been removed by the master. It can be seen that the front part of the internal collision beam is made of black cushioning plastic, and the lower part is made of anti roll bar iron. The lower part of the left front headlight is a white glass water bottle with blue glass water inside. The front lower part of the water bottle is the horn. The anti-collision beam is made of thick materials. The plastic foam in the front can play a buffer role in slight collision, especially in collision with pedestrians, to protect pedestrians. As shown in the picture below, this is a connecting iron block on the upper part of the headlight, which connects the front frame, fender, and body. Therefore, I can see that in some collision accidents, the headlight position appears to be more serious after collision. It is because of the design and materials used at this position that most cars have this structure, which is relatively weak. The situation viewed from the bottom
Read More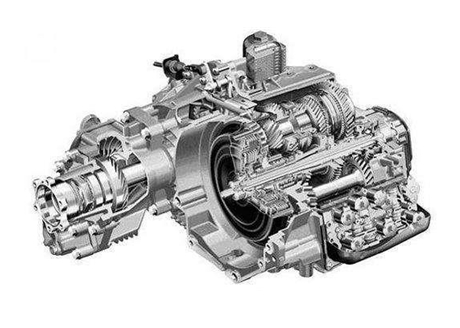
As shown in the figure below, there are no protective plates at the bottom of the engine and gearbox, only small plastic protective plates on both sides. The front part of the plastic protective plate on the right side has been scraped off, and there is a lot of oil stains on the bottom of the gearbox and the subframe on this side. There is a lot of oil stains on this position of the subframe. The master said it is gearbox oil. Where did these gearbox oils come from? The master said that these gearbox oils are all flowing out from the bottom of the gearbox, as shown by the red arrow in the picture below. This position at the bottom of the gearbox has been scratched and bumped, and due to the deep scratches and aluminum alloy material, cracks and oil leakage have appeared. After a collision with the chassis, the car owner discovered oil leakage at the bottom of the gearbox. They quickly called the technician's rescue hotline and towed the car back. The oil seeping from the bottom was blown by the wind to the rear of the gearbox and the subframe. The yellow arrow indicates the oil drain screw of the gearbox. The technician said they have encountered a situation where this screw leaked oil after being touched before. Looking at the rear bracket of the gearbox again, as shown in the yellow area below, there are scratches on the bottom of the bracket. The master said that the scratch was not really serious, but the consequences were more serious due to the special location of the scratch. I asked the master, how to repair scratches like this? The master said that the car has car damage insurance, and the repair is to remove the gearbox and replace the aluminum alloy shell. For such scratches, the master said that if there were protective plates at the bottom of the engine and gearbox that could cushion the scratches to a certain extent, the gearbox would not have such a serious situation, and a repair would cost several thousand yuan. Presumably, car owners will regret not installing protective panels when they see such a situation, but fortunately there is a safety net. The master said that most American cars are like this, with no protective panels on the chassis, and in most cases there won't be any scratches, except for a few rare cases where scratches may occur. As shown in the figure below, the middle part of the chassis has no protective plate or chassis armor, and its condition is very good. Look at the bottom of the fuel tank, there is a heat insulation tile between it and the exhaust pipe, and this position is also deformed. The master said that the deformation of the insulation tile should also be caused by this scratch, and there is no problem elsewhere. The deformation of insulation tiles is easy to solve and can be easily bent over by hand. Although the chassis of this Chevrolet does not have protective plates or chassis armor, there is basically no rusting on the chassis, and there are no rusted areas on the rear of the chassis. Th...
Read More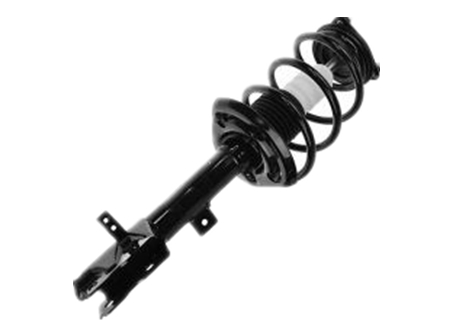
1. The Core Philosophy: Understanding Hydraulic vs. Air Suspension Before we can compare the ride quality, we must first understand the core principles that govern each system. Hydraulic Suspension: The Fluid-Driven System Hydraulic suspension is a closed-loop system that uses incompressible fluid, typically oil, to manage the ride. A pump pressurizes the fluid, which is then directed to hydraulic cylinders at each wheel. The position of each cylinder is controlled by a valve, allowing the system to actively adjust the ride height and damping characteristics. The fluid's resistance to compression is the key to its performance. Air Suspension: The Pneumatic System Air suspension, as the name suggests, uses compressed air. A compressor pump fills a series of air springs (or bellows) with air, creating a flexible yet rigid support structure. The ride height is managed by either adding or releasing air from these springs. Unlike hydraulic fluid, air is compressible, which gives air suspension its unique ability to adapt to varying loads and surfaces in real-time. 2. A Deep Dive into Ride Quality: The Mechanics of Comfort The smoothness of a ride is influenced by two primary factors: ride height control and damping force modulation. We will analyze how both hydraulic and air suspension systems handle these aspects. Ride Height Control: Maintaining Stability and Ground Clearance Both systems excel at adjusting ride height, but their methods have distinct implications for ride quality. *Hydraulic Suspension: The system can achieve a more precise and consistent ride height. Because the fluid is incompressible, the suspension reacts instantly to control signals. This results in less vertical movement and a more stable ride, particularly at high speeds. It is also less prone to sagging under heavy loads, maintaining a constant ride height. *Air Suspension: The ride height control is more dynamic but can be less precise. The compressibility of air means that a signal to adjust height requires a slight delay for the air to flow into or out of the springs. This can lead to a very slight "bobbing" effect over uneven surfaces, where the suspension must adjust the air volume in real-time. However, this same characteristic allows for dramatic height adjustments, such as lowering the car for a sporty look or raising it for off-road capability. Damping Force Modulation: Absorbing the Road's Irregularities Damping is the system's ability to control the oscillation of the springs after they have been compressed by an uneven road surface. It determines how "bouncy" or "soft" the ride feels. Hydraulic Suspension: Offers an extremely fine degree of control over damping. The hydraulic fluid flows through valves that can be adjusted to create a wide range of resistance levels. This allows for a "continuously variable" damping system, where the suspension can be soft and comfortable for everyday driving and firm and sporty for spirited cornering. The fluid's viscosity rema...
Read MoreIn the afternoon, a car owner walked into the store and asked the driver, 'When you step on the brake while driving at high speed, the car will shake noticeably. What could be the problem? After listening to the car owner's question, the driver conducted a road test and found that the problem was indeed the same as described. However, the driver has confirmed where the problem lies, which is caused by uneven brake discs. The car owner asked if the brake disc is uneven and needs to be replaced? The master said that boring the disc is enough, just polish the surface of the brake disc and remove the uneven layer. After the car owner agreed, the master began to dismantle it. As shown in the picture below, the wheels have been removed and the complete brake disc can be seen. The master said that although the surface looks flat, it is actually not flat anymore. Also check the brake pads, they are quite thick. The brake disc is relatively easy to disassemble, and the master removed it in less than five minutes. You can see the signal wheel hub and wheel speed sensor inside the bearing The brake disc has been fixed on the boring machine and will rotate with the fixed shaft. The adjacent blade will scrape off a layer of the brake disc surface. The brake disc has been completely bored and is very flat. The outer side of the brake disc needs to be bored, and the inner side also needs to be bored. The left brake disc also needs to be bored, as shown in the figure below. The left brake disc has been removed. The brake disc has been installed in place, just install the wheels. Finally, the driver conducted a road test and found that there was no shaking when applying the brakes during high-speed driving. If we car owners encounter this typical situation of brake shaking, it is highly likely that it is a problem with the brake disc, which can be solved by boring the disc. If the brake disc is too thin, it needs to be replaced with a new one.
Read More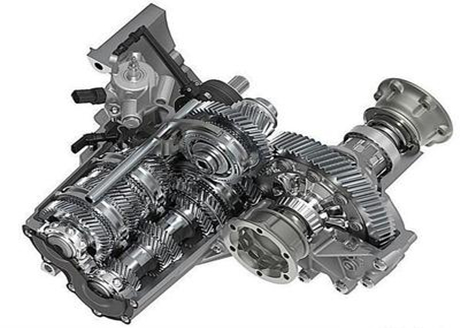
A Cheetah car arrived at the store in 2018, and the owner described the problem as: the antifreeze is always lacking and has been added multiple times. See where the problem lies. The master first opened the engine hood, and the antifreeze in the antifreeze pot was indeed lacking. After checking the antifreeze pipes, water tanks, and other components that are prone to problems, there were no issues. However, many traces of antifreeze leakage were found on the cylinder block, which is relatively rare! After lifting the car up and confirming again, the master told the owner that the problem of leaking antifreeze in your car is difficult to fix and very special. It requires removing both the engine and gearbox to repair, which is very difficult! Can't the car owner repair it without dismantling the engine and gearbox? The master is very certain that it cannot be done. Now let's take a look at what's going on through a set of pictures. As shown in the picture below, the engine and gearbox have been removed, leaving the cabin empty. As shown in the figure below, this is the disassembled engine and gearbox assembly. The engine has a 1.5-liter displacement with turbocharging, and the gearbox is of CVT type. Looking at the turbocharger side, which is the exhaust manifold side, there are many blue marks on the cylinder block, which are signs of antifreeze leakage. After removing the turbocharger and exhaust manifold, the specific situation of water leakage can be seen. This sensor is a knock sensor, there are very obvious rust marks on the outer side of the water blockage Among the three water blockages on this side of the intake manifold, two are particularly leaking and the other is severely rusted. The master said that the engine cylinder block is made of cast iron material, with three on the turbocharger side, three on the intake manifold side, and one at the rear of the engine, which is on the transmission side, as shown in the figure below, located exactly at the fixed position of the transmission! The master also said that the water blockage and leakage are very serious. The leaked water directly enters between the engine and gearbox, and obvious signs of leakage can be seen at the bottom. The master used a connecting rod to knock the new water plug into the cylinder block, and a thin layer of sealant was applied to the side of the water plug. We looked at the installed water plug, and the master said that this would prevent further leakage. Why does water blockage corrode like this? The master said that it is likely because the quality of the antifreeze is too poor and the corrosiveness is too strong. Good antifreeze has anti rust function and this situation is unlikely to occur.
Read More
Just arrived at the repair shop, a Haval H6 was on the lift. Upon closer inspection, it turned out to be dismantling the lower support arm and steering rod ball head components of the chassis. When asked about the reason for dismantling the lower support arm, the technician said it was due to severe chassis noise and obvious looseness when shaking the steering wheel in place. After inspection, it was confirmed that it was a problem with the chassis components. Not only did the lower support arm need to be replaced, but also the steering rod, stabilizer bar, small connecting rod, and rubber sleeve needed to be replaced. Interestingly, we were originally repairing the 2015 Great Wall Haval H6, and the chassis parts we replaced should also be the Haval H6. However, the packaging of the accessories was labeled with the logo of the 07 and 12 Honda CR-V models. Could it be that the accessories were sent incorrectly? The repairman said that the parts were not sent incorrectly and there is nothing unusual about them. Car enthusiasts who are familiar with the vehicle structure may know that the chassis used in the early Haval H6 was basically the same as that of the Honda CR-V of the same period, and most of the chassis parts were also universal. To be more specific, the first generation Haval reverse engineered the chassis of the Honda CR-V, which is very similar in terms of suspension structure and layout. It can be said to be basically the same, except that the Honda CR-V was upgraded to a new chassis structure from 2017, and Haval was upgraded to the Lemon platform from 2020, resulting in a different chassis structure. Let's take a look at the disassembled chassis components. There are a total of three in the following picture. The upper left part is the steering outer rod ball joint, the larger one is the lower support arm, and the lower left part is the lower control arm ball joint. These chassis components on both sides need to be replaced as they all have issues First, let's take a look at the rubber sleeve of the support arm. The internal rubber sleeve is severely damaged and no longer provides the necessary cushioning and support. The shaking situation is quite obvious, which can cause problems such as abnormal chassis noise and vehicle deviation. The problem with the lower arm ball joint and the steering outer rod ball joint lies in the ball joint part. Due to water and soil debris inside, the ball joint lubrication is abnormal, causing looseness and shaking inside, and there may be abnormal noise on bumpy roads. As shown in the figure below, compare the new parts with the old ones. The master said that you can compare the new parts with the old ones of the original car. There will be no problem with the installation. Subsequently, the master installed all these new accessories onto the car without encountering any problems, and the sizes were indeed the same. Then, the four-wheel alignment and road test were carried out to solve the problem.
Read More
When the Audi Q3 arrived at the store, the owner said that he couldn't open the fuel tank cap no matter what, so he came here to see what to do. The mechanic tried many times but was unable to open the fuel tank cap using the normal method, and the emergency switch in the trunk also did not work. He had to use unconventional methods to remove the outer cover of the fuel tank cap, as shown in the following picture. The external cover is fixed with a buckle and can be removed by pushing it at an angle. Then use a small knife to cut off the locking plastic block of the switch position. Anyway, this switch needs to be replaced, so let's temporarily solve the problem at hand. As shown in the yellow circle in the figure below, the small plastic block next to it is the cut switch. This switch is no longer functioning. Please wait until a new switch is sent before replacing it. The component shown in the red area is the fuel tank cap motor switch, which is more prone to problems. Master close the fuel tank cap and then install the outer cover of the fuel tank cap The cover on the outside of the fuel tank cap is easy to install, all with snap fasteners
Read More
READY FOR A SUBSCRIPTION?
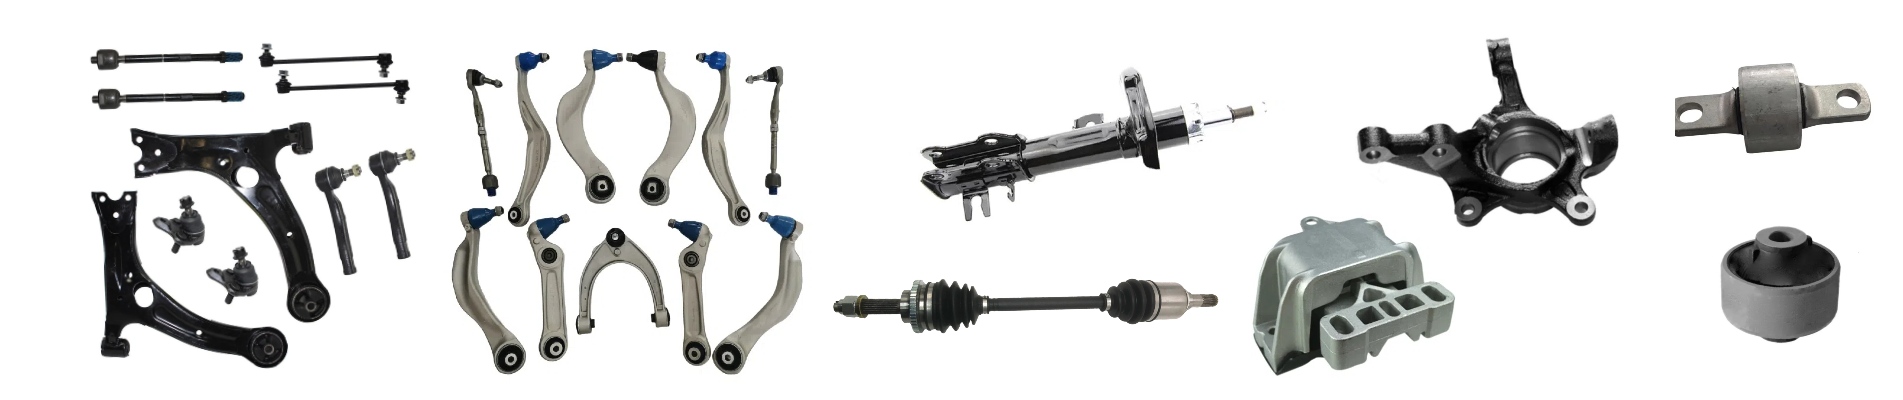
SMK company supply auto parts for below car aftermarket parts: Japanese car: Toyota, Honda, Nissan, Mazda, Subaru, Mitsubishi, Suzuki, Isuzu... European car: BMW, Benz, VW, Audi, Skoda, Porsche, Maserati, Renault, Peugeot, Citroen, Fiat, Opel, Land Rover... American car: Tesla, Ford, Chrysler, Cadillac, Buick, GMC, Chevrolet, Lincoln, Fiat, Dodge, ... Korean car: Hyundai, Kia, Daewoo... Chinese car: Chery, Geely, GreatWall, Haval, BYD, Changan, JAC... We supply parts worldwide: USA, Canada, Europe, Mexico, Colombia, Korea... We are leading supplier for below auto parts: Suspension & Steering Parts(Control Arm, Steering Tie Rod, Stabilizer Link...) Tesla Aftermarket Parts. Engine Mounting/Transmission Mount SMK Auto parts is specifically designed for the automotive repair parts. Our chassis components undergo rigorous testing to easily withstand the complex and variable road conditions and climate. The products not only offer exceptional durability but also provide broad compatibility and excellent stability, ensuring long-term, reliable support for your vehicles. Many overseas clients have established long-term partnerships with us. With the continuous accumulation of customer resources, many overseas clients entrust us with the production of various types of automotive parts products. In order to meet the diversified needs of customers, we have actively expanded new product lines. We adhere to high manufacturing standards, ensuring each product meets the strict safety and durability requirements of different markets. We invite customers from worldwide to choose our products and provide stronger protection and performance upgrades for your vehicles! SMK always adhere to customer-centric, continuously improve product quality and service levels, and strive to create greater value for global customers. In the future, we will continue to adhere to the principle of “quality first, customer first” and work hand in hand with our partners to create a better future.

 IPv6 network supported